There are various types of joinery wood. They include the Pocket-hole joint, the Tongue groove joint, and Mitered butt joints. Let's look closer at them. Once you have a basic idea of what each of them does, you'll have no trouble building a beautiful table. This article will walk you through some of the best joinery wood methods. You will be more confident and informed about the benefits and their applications.
Joint butt and mitered
The common type of joinery used for joining pieces of wood is the mitered, butt joint. This joint uses two boards whose 45-degree corners are cut on both ends to form an 90-degree corner. This joint can also be used to create irregular shapes. Its strength can be compared to a traditional butt joint made from wood. It is not as strong, however, as edge-to–edge joints.
A mitered butt junction can be held together with glue or nails. To prevent splitting, it is best that you drill a pilothole before mitering. Alternatively, you can use a pin nailer, a pneumatic tool that uses tiny brad nails to hold the wood together. These nails leave only a small head, so they are not visible once the wood has been screwed in place.

Mitered groove joint
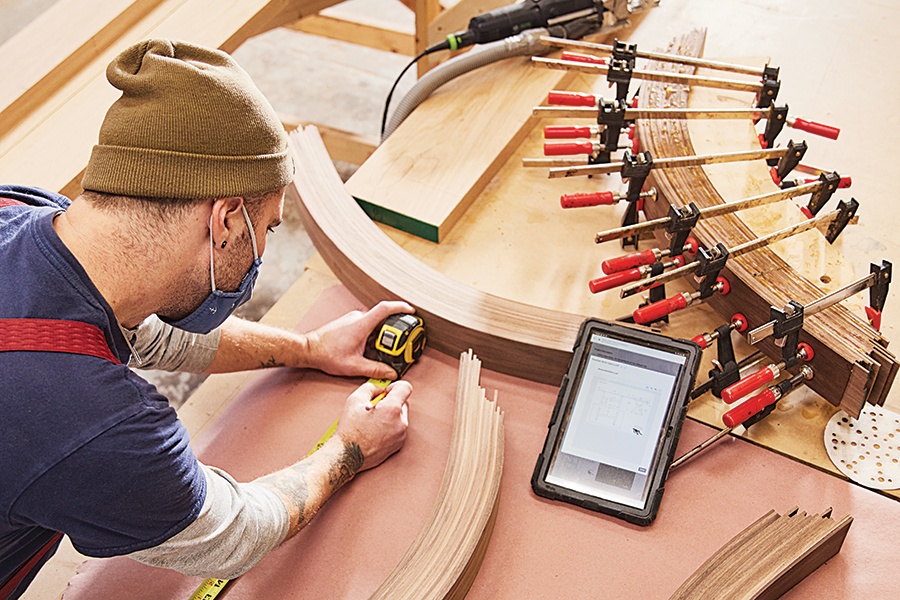
A mitered groove joint in joinery wood has a 45-degree angle between the two pieces of wood. By laying two pieces of timber together and then cutting out the grooves, you can create a miter-joint. Making the cut while the wood is still square makes the job safer and much easier. Place a saw blade into the gap after you have cut the grooves. Place the spline in place by gluing, nailing, or screwing it.
The Mitered groove joint is another variation of the traditional biscuit joint. It is created by carving grooves into the wood pieces and then gluing them together. This type of joint is commonly used for solid panels made with different types of wood. It is more difficult to see than a traditional wood joint because the joinery is invisible. It is important that you cut the biscuit joint from the same side of the wood as the one being joined.
Tongue-and-groove joint
The common tongue and groove joint in joinery is the most popular, however there are many methods to make it. This joint is best created by a table saw. It can cut the joint using a single blade to create the grooves and the dado stack in one pass. A router table, however, can make tight joints with matching bits and is more efficient.
A tongue-and-groove joint is a great way to join similar pieces of wood. This type of joint is commonly used in high-quality cabinetwork, but can also find other uses. This joint is also used for some wood flooring types, such as architectural paneling and cabinet doors. Some people even use it as a drawer track, since it's so easy to assemble. If you're not confident with tools and can't afford to hire a joiner, you can make your own with a simple plane or saw.
Pocket-hole joint
The most commonly used type of pocket hole joint is made from wood. It can be used to the edges and faces of the wood. However, it can not be used on any end grain. To ensure the perfect fit, you need to be able to use pocket-hole jointery. For beginners, pocket–hole joinery makes it easy to create a pockets-hole joint.
To create a pocket-hole join, you will need to drill a hole through a piece of wood with at least one and a half inches in depth. A pocket-hole jig is a useful tool that allows you to drill these holes with an accurate angle of 15o. A cordless drill is required to use a Pocket-hole Jig. You can also make a pocket-hole joint using a Porter-Cable PC560.
FAQ
What furniture can I refinish?
Yes! There are many options for refinishing furniture that you don't need to hire a professional. Here are a few ideas:
To remove stains and scratches, use sandpaper. Next, wipe the surface clean with a damp cloth.
Apply clear polyurethane paint. Let dry completely before moving furniture around.
Use acrylic paint to paint furniture.
You can stain the furniture instead of using paint. Furniture will look richer with the stain.
Shellac wax is applied. Wax will protect the wood and add shine.
What is the difference between a hobbyist or a professional woodworker, and how can you tell?
Hobbyists enjoy creating things out of wood. Professionals tend to focus on the quality. Hobbyists usually take pride in their creations and often share them with friends and family. Professionals spend hours researching design ideas before starting to work on a project. Professionals will be meticulous about all aspects of their work, from selecting the right materials to finishing it.
What kind and type of wood should i use?
Oak, maple, cherry and mahogany are the most common wood types used for woodworking. Each wood type has its own characteristics which affect the final product's appearance and feel. Oak tends to be harder and darker than other woods. Birch is light and soft, while mahogany can be heavier and more dense. You also have the option of solid wood or veneers. Veneers are thin sheets of wood that are glued together to form a single layer.
How long does a piece take to finish?
It all depends on what type of wood you use, how complex your design is, and how much finishing you use. For example, hardwoods require more maintenance than softwoods. Hardwoods are more expensive than other woods. But they last longer, and resist moisture better. The process of finishing a piece of furniture typically takes anywhere from one week to three months.
What is the average time it takes to finish furniture?
It depends on what size piece of furniture you have. Boxes and picture frames are small projects that can be completed in one day. Larger projects like tables and desks take many days. It takes time in order to properly stain or seal the wood.
How does a beginner woodworker earn money?
Many people are starting to learn how to build furniture because they want to start an online business. However, if you're just getting into furniture building, there are other options than selling on Etsy. You can sell at local craft fairs. A workshop could also be offered for people who are interested to learn how they can build their own furniture. If you have experience as a carpenter or builder, you might consider offering services such as remodeling homes or creating custom pieces for clients.
Statistics
- The best-paid 10 percent make $76,000, while the lowest-paid 10 percent make $34,000. (zippia.com)
- The U.S. Bureau of Labor Statistics (BLS) estimates that the number of jobs for woodworkers will decline by 4% between 2019 and 2029. (indeed.com)
- In 2014, there were just over 237,000 jobs for all woodworkers, with other wood product manufacturing employing 23 percent; wood kitchen cabinets and countertop manufacturing employing 21 percent. (theartcareerproject.com)
- Overall employment of woodworkers is projected to grow 8 percent from 2020 to 2030, about as fast as the average for all occupations. (bls.gov)
External Links
How To
Tips for driving a nail in wood
The first step in driving a nail into wood is to choose the correct size and type of hammer. There are many types of hammers that you will find: claw hammers and sledgehammers; mallets; ball peen hammers; and hatchets. Each type has its strengths and weaknesses. A claw hammer, for example, is the best choice if you need to hit nails hard. However, it's not easy to know exactly where the impact will land. A sledgehammer is useful for striking large areas at once but too heavy to be effective for smaller tasks.
Place your hand flat on the side of your chosen hammer so that the handle rests in your palm. Take the handle and hold it with both hands. But don't press down so hard you injure yourself. Keep your wrist relaxed and the hammer straight up. You should then swing the hammer straight up, keeping your wrist relaxed. You should feel the impact on the nail from the hammer. If you're having trouble getting the hang of swinging a hammer, practice with a block of wood until you get the rhythm down.
You can now drive the nail by holding the hammer to your body. The nail should be perpendicular to wood's surface. Keep your eyes focused directly on the tip of the nail. Swing your hammer forward. Then follow through with the motions of the hammerhead. Continue this motion several times, slowly increasing the speed of each swing. Once you've mastered the technique, try adding power to your swings. Then, raise the hammer from your shoulder to bring it down. You'll have more energy to work with.
Once you have made the first hole, remove your hammer. You can then remove the rest of the nails using a prybar or a screwdriver. You should ensure that the nails are flush with the board's surface to avoid splitting the wood.