For beginners, it might seem difficult to know how to add texture and dimension to your woodturning project. Ernie Conover shows you how to add texture to your woodturning projects. Textures can be natural patterns used to embellish objects in many different ways. Adding them to your turning projects will add personality and style. There are many ways to add texture and color to your project.
Making a rolling pin
Perhaps you have been interested in woodturning and wondered how to make your own rolling pin. Wood rolling pins tend to be long and made from quality wood. You can use any wood depending on the length of your pin. However, the best woods to roll pins are hard maple or cherry, applewood, ash, and similar hard woods. Although some versions are cheaper made of soft maple or birch it is important to select the right wood for this task.
First measure the handle's diameter. Next, measure the diameter your rolling pin. Use the Parting Tool to measure the diameter and then use the Roughing Gouge to skim down the handle length to its diameter. The Bowl Gouge can be used to create the curves for the rolling pin after you have measured the diameter. This will allow you to start threading the pin. Once your rolling-pin is complete, apply a foodsafe finish and let it dry on a tray for 15 minutes.
Make a salt-and pepper shaker
Whether you're looking for a unique gift or you'd like to have a handmade salt-and-pepper shaker in your home, there are many ways to make these handy utensils. To make a beautiful salt and pepper shaker, you can use a mason-jar. Use a small nail file and hammer to gently punch holes between the letters. You will need to leave 5/8 inches of wood at each end. Place a cork through these holes. Add salt and pepper to the shaker and you can enjoy your creation.
You might have a collection of Coca-Cola bottles lying around your home that aren't being used, and you can use these bottles to make a salt-and-pepper shakeer. To add some detail, you can use tape to remove the lines from the bottle. You can also use any colour of all-surface paint.
Making a bottle cap

Making a bottle capper is easy with these steps. The first is to mount the blank between 2 centers. This will produce a collet which can be used to mount the chuck. You will then turn the piece to create the desired shape. Then, you'll turn a threaded piece to attach the decorative turned portion to the bottle. Different sizes can be used for threaded posts.
It is essential to select the right wood type for your project before you begin. You can purchase blanks at a craft store. You can buy blanks at a craft shop. If you plan to cut your own wood, make sure the pieces are straight and square. You may need to square up wood purchased from a retailer. You can also use a tablesaw or chop saw instead. To square up odd-shaped pieces, you can use a clamp. Finally, sand the stopper with a fine-grit sandpaper to make the finish smooth and even.
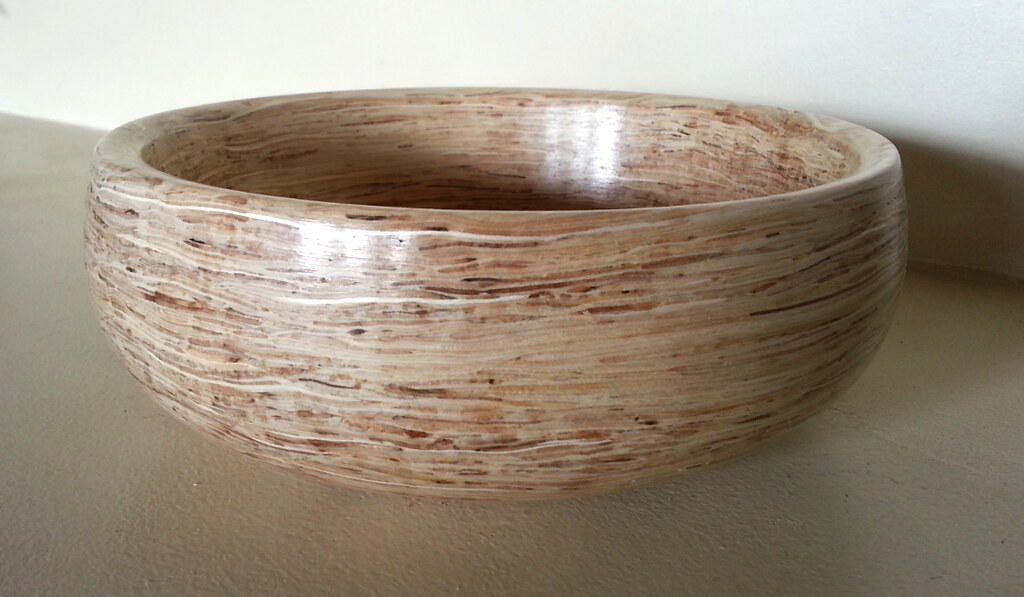
Constructing a stacked, ring bowl
When you make a stacked ring bowl for woodworking, you can create a large bowl by cutting two or more flat boards into concentric rings. The rings should be glued together with a dovetail joint. The boards should measure five inches wide by one inch thick. The faces of the boards have been joined and the joining edges have been planed.

A trammel or jig can be used for cutting a segmented, ring bowl. The board thickness will determine how many layers are needed to reach the desired height. The minimum thickness for the board is one inch. Preferably, it should not be thinner than 5/8 or 3/4 inches. You can also use a circle-drawing jig or trammel to mark the band saw lines.
FAQ
How much should a Woodworker Charge per Hour?
Hourly rates for professional woodworkers vary depending on many factors such as skill, experience, availability, geographical location, and other variables.
The average hourly rate for a skilled woodworker ranges from $20-$50 an hour.
A less skilled woodworker might charge as low as $10 per hour.
How can you calculate the woodworking price?
Remember to keep costs as low as you can when calculating project costs. You should always try to make sure that you are getting the best deal on materials. It is important to take into consideration all factors that can impact the cost of your projects. These include time, skill and experience. If you want to get an idea of what you can expect to spend on different types of woodwork projects, check out our guide to the average price of common household DIY tasks.
Where can I purchase hardwood lumber?
Home Depot has hardwood lumber for sale. You can find all types of wood products at Home Depot, such as flooring, cabinets and furniture.
A large variety of engineered hardwoods is available to them, including Ipe (Araucaria Angustifolia), Brazilian Cherry and Peau d'Arco.
These woods can also be purchased online by simply searching Google for "hardwood timber"
How long does a piece take to finish?
It all depends on what type of wood you use, how complex your design is, and how much finishing you use. Hardwoods, on the other hand, are more durable than softwoods. Hardwoods are also more expensive than softwoods. However, they are stronger and more resistant to moisture. The average time it takes to finish furniture is one week to three weeks.
How often should I purchase new supplies?
You will likely need to replace some tools over time. If you're using hand tools, you'll need to sharpen them regularly. If you are using power tools, you will need to purchase replacement parts regularly. Try spreading your purchases over a few months so you don't buy too many at once.
Statistics
- Woodworkers on the lower end of that spectrum, the bottom 10% to be exact, make roughly $24,000 a year, while the top 10% makes $108,000. (zippia.com)
- The U.S. Bureau of Labor Statistics (BLS) estimates that the number of jobs for woodworkers will decline by 4% between 2019 and 2029. (indeed.com)
- If your lumber isn't as dry as you would like when you purchase it (over 22% in Glen Huey's opinion…probably over 10-15% in my opinion), then it's a good idea to let it acclimate to your workshop for a couple of weeks. (woodandshop.com)
- Most woodworkers agree that lumber moisture needs to be under 10% for building furniture. (woodandshop.com)
External Links
How To
How to make wood joint
This tutorial will demonstrate how to join two pieces together of wood. We will use the pocket hole joint, which is drilling holes in the wood to join them. This method is great if your wood's straight and smooth. You might consider dowel joinery if your wood isn’t straight or flat. Here are the steps
-
Drill Pocket Hole Joints. Start by measuring and marking the spot where the pocket hole joint will be placed. Then drill 3/4 inch deep holes into the ends of each piece of wood using a jig saw or handheld drilling machine.
-
Sand Smooth. Sanding the edges of the wood will help to prevent the joint from splitting later.
-
Glue both sides together. Apply glue to the sides of both wood. Allow it to sit for approximately 5 minutes before you clamp the pieces together.
-
Clamp the Pieces Together. After the glue has dried properly, clamp the pieces together to make sure they are flush.
-
Trim Joinery. Trimming the joinery after glue has completely dried.
Allow enough space between pieces so you can turn them inside out.