
There are many ways to lathe the sand. However, some people prefer a slower speed. No matter which method you prefer, sandpaper will wear over time. To cut wood, you will need to increase pressure. This causes heat generation as well as a slick, scratchy finish. This article will provide tips and information on how to make the most out of your lathe.
Sandpaper that is too thin can affect lathe sanding
If you're not familiar with the effects of dull sandpaper, here's an overview of how this material can impact your work. This makes your work less productive by causing the paper to grab the wood or come in contact with the jaws. This can lead to poor quality finish and inefficient sanding. Avoid this by buying sandpaper from a specialist shop. It is amazing the difference.
Dry sanding paper is susceptible to easily tearing, which can cause uneven finishes. If this happens, the workpiece may fly higher and then hit the operator. It could also get caught against the sanding surface, and be sucked into a machine. Lathe sanding can be affected by dull sandpaper
You should use finer grades of sandpaper.
A lathe can be sanded with progressively finer paper grits to achieve a smoother surface than one made from coarser papers. You have the choice of 100, 180 or more depending on the material. Each grit is designed to replace any scratch left by the previous grit. The next grit can remove those marks. The final grit can be 400. Many turners suggest hand sandpaper as the final step. It should follow the grain of wood. The sanding can also be done with compressed air.
The coarser grits of sand paper remove the coarser sanding grades, but will leave a hazy sawdust or grit on your turning. Finer grits will remove finer scratch marks. Finer sandpapers will get rid of even the smallest details.
Use lathe sandpaper to avoid clogs
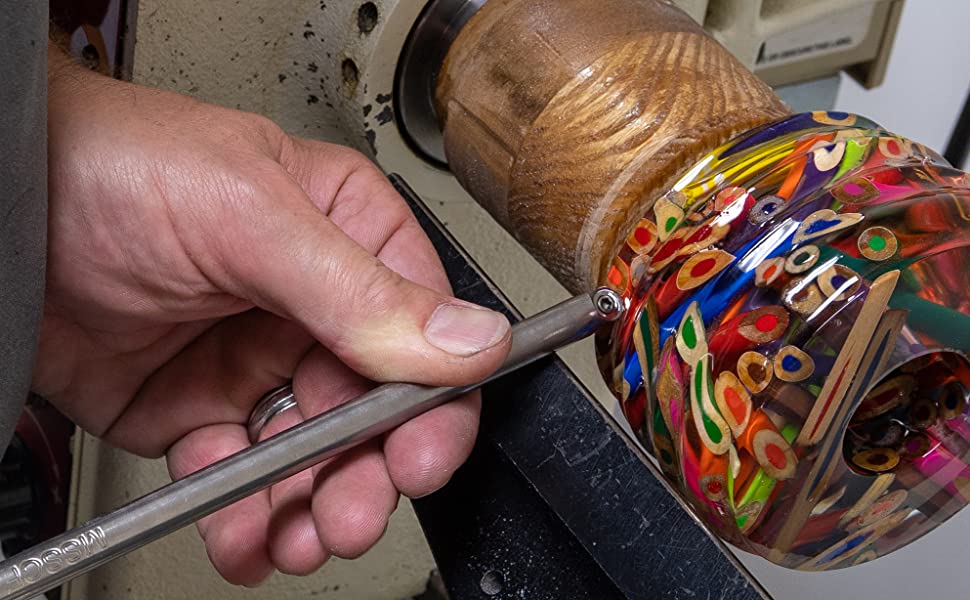
You need to use the correct grit for the job in order not to get clogged. Ask a local expert for assistance. You can also purchase variety packs that are great for multiple grades. Below is a list of the various types and grit numbers of sandpaper. Aluminum oxide sandpaper can be used for general sanding tasks, while synthetic sandpaper works better for woodworking applications.
Another cause of clogs can be floor finishes. Floor finishes can cause clogs by leaving sticky residue. The type of finish you want to achieve should dictate the type and grade of sandpaper that is used. For light-duty, you should use sandpapers that have a higher grit. Finer sandpapers can be used for more heavy-duty work. They are more likely to clog, and can cause more scratches.
Using a sanding belt holder
The use of a sanding ring on a lathe helps to eliminate the risks and ensure safe and efficient sanding. The sanding-belt holder attaches directly to the tool case turrets on traditional lathes. This allows the workpiece to rotate at its own speed. They are available in two sizes: 25 mm or 50 mm. They can hold different abrasion grits and are compatible with many belt diameters.

A roller stand or worktable extender can be used to support long workpieces or those that require extra support. The tilt lock should not touch the belt and the worktable should be parallel with the belt. After you have installed the sanding holder, you are ready to start sanding. After you've completed assembly, you may use the extension worktable to sand the entire workpiece.
Using a sherpa for lathe sanding
If you've ever used a lathe sander, you know how easy it is to slip a disc from the machine's chuck and lose it. A donut can be used to change the abrasive disks. It can be attached with masking tape to the tailstock. Make sure that the back side of the donut is facing in when using it. Mark the abrasive rim halfway between its center and the edge. Cut the disc with a thin knife.
FAQ
Where do you start when it comes to woodworking?
Learning how to build furniture is the best method. You'll need tools, and you'll have to make mistakes along the way, but if you keep at it, you'll eventually figure out what you're doing.
You should first choose the project you wish to complete. It can be as simple as a small box, or as complex as a complete entertainment center. Once you have chosen a project, locate a local woodworker who is skilled in this kind of work. Ask them for their advice about the tools and where they can be found. You might even ask whether there's someone else you can talk to who does this kind of work.
What furniture can I refinish?
Yes! There are plenty of ways to refinish old pieces of furniture without having to pay a pro. Here are some ideas:
Use sandpaper on the surface to remove any stains or scratches. After that, use a clean towel to wipe the surface.
Use clear polyurethane varnish. Let dry completely before moving furniture around.
Use acrylic paint to paint furniture.
Instead of using paint, stain is a better choice. You can give your furniture a rich appearance with stain.
Apply shellac wax. This will protect and shine the wood.
How do I know what tools are best suited for me?
When shopping for tools, it helps to think about your needs and preferences. Do you prefer metal or plastic handles What size screws and nails do you use most often? Are you comfortable with power tools, or would you rather use hand tools?
Where can I find free woodworking plans?
Woodworking plans can be found online without the need to purchase books or magazines. You just need to search Google. You can search Google for "free woodworking" and hundreds of websites will appear allowing you to download plans.
Statistics
- Woodworkers on the lower end of that spectrum, the bottom 10% to be exact, make roughly $24,000 a year, while the top 10% makes $108,000. (zippia.com)
- The U.S. Bureau of Labor Statistics (BLS) estimates that the number of jobs for woodworkers will decline by 4% between 2019 and 2029. (indeed.com)
- The best-paid 10 percent make $76,000, while the lowest-paid 10 percent make $34,000. (zippia.com)
- In 2014, there were just over 237,000 jobs for all woodworkers, with other wood product manufacturing employing 23 percent; wood kitchen cabinets and countertop manufacturing employing 21 percent. (theartcareerproject.com)
External Links
How To
How to properly operate a handsaw
Hand saws are used to cut the wood into pieces. Hand saws come in many forms, including circular saws. A handsaw is a tool made out of metal or plastic that cuts material such wood, plastics, metals etc.
A hand saw has the advantage of being able to cut at any angle and without having to adjust the blade. It's also much easier to sharpen them than power tools. But there are disadvantages. They can be very heavy and bulky so it is important to take care when you transport them. Additionally, if they are unfamiliar, it is possible to injure oneself.
There are many different ways to hold a hand saw. You should always keep your hands far away from the blades while cutting. If you don't, you might get hurt. To hold the saw properly, your thumb should be in contact with the blade. You won't accidentally touch it.
Never place anything under a piece of wood that you're cutting with a handsaw. The blade could slip if you do this. Before you begin cutting, make sure to inspect the area. Make sure no nails or screws are hidden beneath the wood.
You should always wear safety goggles when working with a hand saw. They protect your eyes from dust, which makes it easier to see what is happening. Safety glasses are also useful because they protect your face from flying debris.
To work safely with a handheld saw, you need to first be able to operate it. Next, practice until your confidence is high enough to begin cutting. You'll soon be able to cut any item once you have mastered the basics.