
If you have ever dreamed of creating wood-carved caricatures, this is the right place. You'll find information about safety and design. It's possible to make a caricature from a standard image into a masterpiece. Here are some tips to help you make your caricature unique. There's also the option of taking classes from caricaturists.
Techniques
Wood carving caricatures offer a unique way to create sculpture. They're funny and can tell a tale without words. Caricature depicts a cartoonized version of a real person. Dave Stetson, wood carving carvers, has a strict code that ensures realistic representations of real people. They also have specific rules that must be followed in order to create effective caricatures. This article will provide the basics of caricature carving and provide tips for creating one.
First, it requires great focus when carving an astronaut. A spoon carving knife or the whittling blade are required to carve an astronaut. They are both delicate tools. To make the job easier, you can use templates while you are carving the astronaut. A tutorial will give you step-by-step instructions for how to complete your caricature. You might consider buying a tutorial on the subject if you have a tight budget.
Designs
You can create wood-carved caricatures in many different ways. An excellent way to begin is by using a template. You can also purchase a cutout of cardboard and use the same patterns to create different caricatures. A tutorial on caricature carving can be followed. This article will introduce you to some of the best designs and techniques of carving a caricature.
Fred's first caricature was titled "Aristocrats of the Roads". It depicted two men wandering. It was carved out of Honduras Mahogany. Fred entered the piece in competitions and received several awards. He also featured it on the Chipping Away Catalog. Fred also carved a caricature Luciano Pavarotti in 2009, earning him the Second Runner-Up Award at a national woodcarving convention.
Eyes
The first thing to remember when carving caricatures of people is to make sure the eyes look realistic. A caricature with realistic eyes is acceptable, but it can be frustrating for the viewer if the detail is not sufficient. You can take a photo of an existing carving and follow the steps to make sure your eyes match.
Next is to determine the eye shape. Some carvers use the same eye shape as others. Others create more convincing eyes using different shapes. To make your eyes symmetrical, you can use stop cuts to carve the lower eyelid. Finally, you'll need to carve your pupil and iris. You can now move on to the next stage of carving the caricature.
Safety
The wood carving caricatures are very unique. They tell stories without the use of words. Artists who create them take great pride in their accuracy. Caricatures are often described as depictions of people or things that are exaggerated to convey an impression, or satire. Dave Stetson, wood carving carver has established stringent rules for carvers safety and quality.
Before carving a caricature from wood, you need to first clean it and remove pencil marks. Clean the surface with dish soap or water. The 60-degree V-shaped tools can be used to carve the neck. An easy-to-use 60-degree V shaped tool can help with the carving process. Ramelson's 60-degree V-shaped Carving Tool is an excellent choice. It is very sharp and easy-to-use.
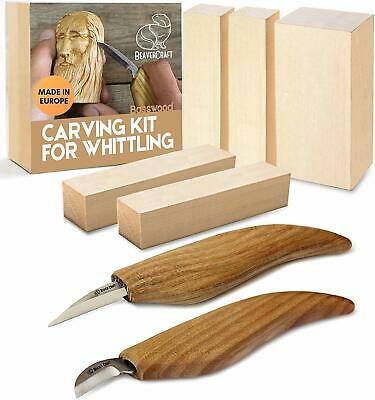
Materials
Carving animals can be fun and challenging. Learn how to make caricatures using wire and wood. Even though animal caricatures might not be as complex as human caricatures but they are still entertaining and can tell a story with no words. Caricatures have a heightened sense of reality. While carving caricatures is a difficult hobby for beginners, it can be very rewarding for those who are more experienced.
A wood board and chisels are the two main materials that you need for carving. You will also need a hammer. Acrylic white paint can be used as the base layer. It is available at craft stores. After the base layer has been completed, you can start the second layer. This layer will include a golden brown color and a few drops (Academy) of burnt-sienna. For the face, you should use 2 drops of sunkissed peach.
FAQ
How can I learn basic woodworking skills
It is an excellent way to learn how to build furniture. You can make a simple bench yourself. This project can be done with any kind of wood that you have at home. If you are unsure what type of wood is best, you can get cheap pine boards at Lowes (or Home Depot) instead. After you've constructed your bench you'll want sand all the rough edges off and varnish it.
How much does a hobbyist need to invest in getting started?
If you're looking to start your own woodworking business, you'll probably need some capital to buy the necessary tools and supplies. You can start by purchasing a small table saw and drill press as well as a circular saw, circular saw, jigsaw and sanding machines. These items don't cost much so they won't break your budget.
What is the hourly rate for a woodworker?
The hourly rate of a professional woodworker depends on many factors including experience, skill level, availability, location, etc.
A skilled woodworker can expect an hourly rate of $20-50.
A less skilled woodworker can charge as low at $10 an hour.
Where do I start with woodworking?
The best way to learn how to build furniture is by building furniture. You will need tools. There are bound to be mistakes. But if your persistence is consistent, you will soon master the craft.
Start by choosing a project you'd like to complete. It can be as simple as a small box, or as complex as a complete entertainment center. Once you've decided on a project, find a local woodworker who specializes in that kind of work. Ask the local woodworker for help in deciding what tools and where to get them. Perhaps you could ask if there is someone else who does this type of work.
What tools are best to begin with when I become a woodworker
Woodworking is an art form that requires patience and practice. It takes time to master all the tools and techniques involved in woodworking.
There are many woodworking tools on the current market. Some prefer power tools while some prefer hand tools.
It's your choice. But you should ensure that you pick the right tool. Start with a basic set if you don’t have any previous experience.
A router is a tool that cuts intricate shapes in wood. You can also learn how to use it. You can find these at most hardware stores.
Statistics
- Woodworkers on the lower end of that spectrum, the bottom 10% to be exact, make roughly $24,000 a year, while the top 10% makes $108,000. (zippia.com)
- The best-paid 10 percent make $76,000, while the lowest-paid 10 percent make $34,000. (zippia.com)
- If your lumber isn't as dry as you would like when you purchase it (over 22% in Glen Huey's opinion…probably over 10-15% in my opinion), then it's a good idea to let it acclimate to your workshop for a couple of weeks. (woodandshop.com)
- Overall employment of woodworkers is projected to grow 8 percent from 2020 to 2030, about as fast as the average for all occupations. (bls.gov)
External Links
How To
How to make wood joint
This tutorial will show how to join 2 pieces of wood together. The "pocket hole joint" is a method whereby we drill holes into the wood and glue them together. This works well if the wood is straight and smooth. Dowel joinery might be a better option if your wood is not straight or flat. Here are the steps
-
Drill Pocket Hole Joints. First, measure the area where you wish to place the pocket joint. With a handheld drill machine or jig saw, drill 3/4-inch deep holes in the ends of each piece.
-
Sand Smooth. Sanding the wood's edges will help ensure that the joint won't split later.
-
Glue both sides together. Apply glue to both the ends of the wood. Let it sit for about 5 minutes before clamping the pieces together.
-
Fix the Pieces together. Once the glue has dried, clamp the pieces together so they are flush.
-
Trim Joinery. Trim any excess wood surrounding the joint once the glue has dried completely.
Make sure to leave enough room between the pieces so that you can turn them inside and out.