
You might feel intimidated when you first start carving spoons. Fortunately, there are many techniques that will make the process a breeze. Here are some tips and tricks for starting spoon carvers. You will also learn what types of woods to work with, tools to use, and how to take care of the wood properly. Follow these steps to create beautiful spoons in no time. This will ensure that you have many years of useful use in your kitchen.
Lessons learned
There are several lessons to be learned when carving cedar spoons. Generally speaking, the most important factor is the wood type. While almost any type of wood can be carved, some types are easier to carve than others. Cherry and other soft hardwoods like cherry are better for beginners. To see how it looks, you can always practice with a smaller piece.
Once you've figured out the basic shape, you can start on the head. You may find it easier to carve the spoon's convex backside. To form a smooth slope you'll need material to be removed from the edges. With a rounded sweep saw, smoothen the spoon's face.
Woods to use
When looking for a spoon carving wood, consider two types: Eastern Red Cedar and Yellow Cedar. These woods make carving easier, while Western Red Cedar is more difficult. Although each variety has its pros and cons, both provide excellent results and will make wood carving enjoyable. Start woodcarving with soft maple and pine if you're just starting out.
It is important to consider the moisture content of wood used for spoon carving. Freshly-cut wood has higher moisture content, making it easier to carve with hand tools. You may need to cut it to a rough size before drying. Only after the wood has completely dried can you finish it. If you don't live near a lumberyard you can order wood online.
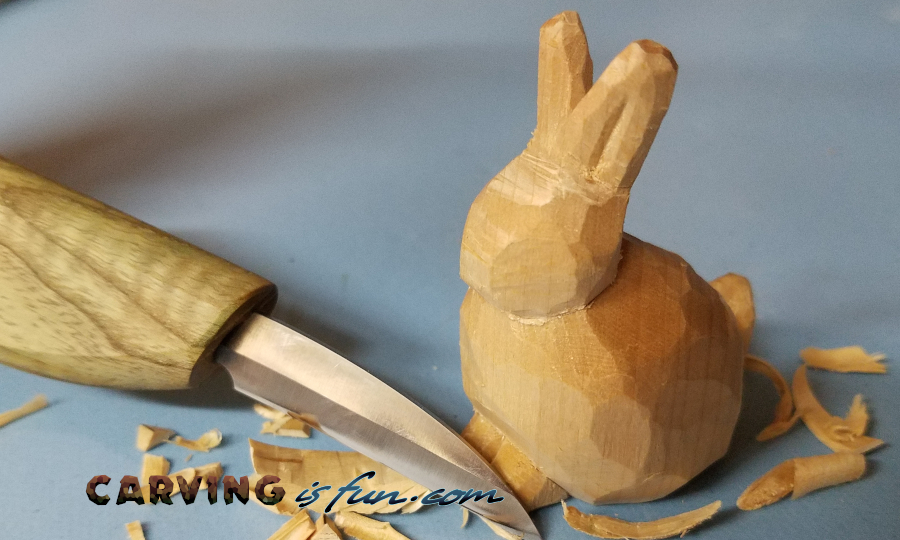
Tools to Use
The tools that you will need when carving cedar spoons depend on your skills. A chisel is the most commonly used tool. A wood carving tool should be sharp enough that it can cut fine lines. However, a sweeping saw is a better option for large divots. A clamp or vise can also be useful. You can use both of these tools to hold the spoon handle when you're carving.
A carving knife is an indispensable tool. A good carving axe is light and easy to use. To create an edge around the bowl of the spoon, you can also use a carving knife. You can use this tool to shape a spoon. It can also be used in creating shallow or large bowls. Your safety and comfort are also important considerations when carving.
Wood care
You need to be familiar with how to care for your wood before carving. You can care for your wood using the instructions included in the book. Older branches may crack on the interior, so be careful. You should store your spoon somewhere warm, dry, and out of direct sunlight after carving it. A piece of leather can be used to double as a tool-roll.
It is recommended that you clean wood by hand. Avoid soaking it in hot water as it can cause cracking or splitting. Use warm water and a mild soap. Avoid using a microwave or a dishwasher, as they can cause wood damage. After drying, put it in the fridge or freezer. This will prevent the wood from fading. The spoon should not be oiled. Care of cedar spoon carving wood
Finishing a wooden knife

It's not easy to carve a beautiful wooden spoon. If you want your spoon to look beautiful, you can leave it unfinished, chipped, rough. However, it is possible to refine the design by applying a finish to the spoon. However, this can cause your carving knife to become duller. Any small imperfections will disappear after a few weeks.
After making the bowl and handle of the spoon, you are ready to start shaping your head. While the concave side is easier to work with, you must ensure that the grain of the wood runs parallel through the entire spoon. This is possible by using a rounded sweep tool. To hold the stock, use two hands. Use the angled gouge for shaping the spoon's wall.
FAQ
How much do hobbyists need to invest in starting a business?
If you're looking to start your own woodworking business, you'll probably need some capital to buy the necessary tools and supplies. The best place to start is by buying a small drill press, circularsaw, circular saw or sanding machine. These items won't break the budget and aren't expensive.
Where can you buy hardwood lumber?
Home Depot sells hardwood lumber. They sell all kinds of wood products, including flooring, cabinets, furniture, etc.
A large variety of engineered hardwoods is available to them, including Ipe (Araucaria Angustifolia), Brazilian Cherry and Peau d'Arco.
You can search Google for hardwood lumber to find them online.
Do I have the potential to make a decent living doing this?
Yes! In fact, most woodworkers already have it. According to the U.S. Bureau of Labor Statistics in May 2012, the median annual income for woodworkers was $34,000 This is more than the national average of 31,000 per annum.
How can I keep my shop organised?
A designated place to store your tools is the first step towards keeping your workshop clean. Keep your tools away from dust and debris, so they stay sharp and ready to work. Use pegboard hooks to hang tools and accessories.
How do I learn basic woodworking skills?
Building a bench is a great way to get started in furniture building. You can use any wood you have in your home to complete this project. If you don't know what kind of wood to use, then go ahead and buy some cheap pine boards from Home Depot or Lowes. You'll need to sand the bench after it's built. Then, finish it with varnish or a stain.
How do I calculate woodworking prices
It is essential to calculate costs as accurately as possible when pricing any project. Make sure you're getting the best prices on materials. It's also worth taking into account all the other factors that may affect the cost of your projects, such as time, skill level, and experience. Check out our guide on the average cost of common DIY projects to get an idea of how much you can spend on woodwork projects.
Statistics
- In 2014, there were just over 237,000 jobs for all woodworkers, with other wood product manufacturing employing 23 percent; wood kitchen cabinets and countertop manufacturing employing 21 percent. (theartcareerproject.com)
- Woodworkers on the lower end of that spectrum, the bottom 10% to be exact, make roughly $24,000 a year, while the top 10% makes $108,000. (zippia.com)
- The best-paid 10 percent make $76,000, while the lowest-paid 10 percent make $34,000. (zippia.com)
- Most woodworkers agree that lumber moisture needs to be under 10% for building furniture. (woodandshop.com)
External Links
How To
How to stain wood
The process of staining wood involves the application of chemicals to the wood's surface, which causes it to change its color. This chemical reaction changes the wood's color from white to brownish. While oak is the most widely used type of wood for staining purposes, other types of wood are also available.
There are several ways to apply stains to wood surfaces. Some methods involve mixing the stain with a solvent (such as turpentine) and then brushing or spraying the mixture onto the wood. Another method involves applying a solution of water to the wood. It is possible to mix stain into varnishes and paints, making it part of the finishing coat.
Preparing the surface for staining wood is the first step. The wood must be thoroughly cleaned to remove all grease and dirt. Sanding smoothens any scratches or rough spots. You must then decide on the type of stain that you wish to use. Penetrating stains are different from non-penetrating. Penetrating stains penetrate deeper into the wood than non-penetrating ones, making them ideal for dark colors such as mahogany. Non-penetrating stains work best with light colors like maple.
You will need to decide on the type of stain you want to use, and then prepare your tools. Because you can spread the stain evenly with a paintbrush, it is ideal for applying them. A few rags are also handy to clean up any spillages after you have finished painting. You should have enough containers to store the various components of the stain mixture if you intend to mix it yourself.
Once you have prepared all your materials, it is time to clean the areas where you will stain the wood. Use soap and warm water to remove dust and grime. Use a dampened rag and clean water to wipe the furniture. If you intend to stain darker wood, make sure you get rid of any debris.
Next, apply the stain. Begin at one end and spray or brush the stain on the wood. Slowly and carefully work your way along the grain to reach the opposite end. You must be careful not to allow the stain to drip off the wood's edges. Let the stain dry completely before proceeding with the next steps.
Clear polyurethane is used to protect the painted surfaces. Apply three coats of polyurethane sealer. Allow the third coat, which should dry overnight, to dry before sanding.