This guide is for those who are interested in intarsia-wood art. This information includes information about Wood types, patterns and tools as well as techniques. You can read on to learn about this amazing craft. Depending on your skills, you might also consider using a different kind of wood. You can try making a sample to get familiar with the process if you are new at this craft.
Patterns
You can make intarsia ornaments for holiday, Christmas, and tree occasions if you're a good woodworker. The intarsia wooden patterns included in this book can be used by all levels of woodworkers and show the artistry that the process requires. There are 21 full-size intarsia designs included. Also, helpful information on shaping, blades and wood is provided.
Intarsia allows you to create an original piece of furniture, or wall hangings by using different wood species. It is like building a puzzle with various pieces of wood placed next to one another. Each piece of wood can then be stained or polished to give it a unique look. Intarsia wood patterns can be extremely challenging to make, so finding a good source of free intarsia patterns will help you make the right decisions for your project.
Tools
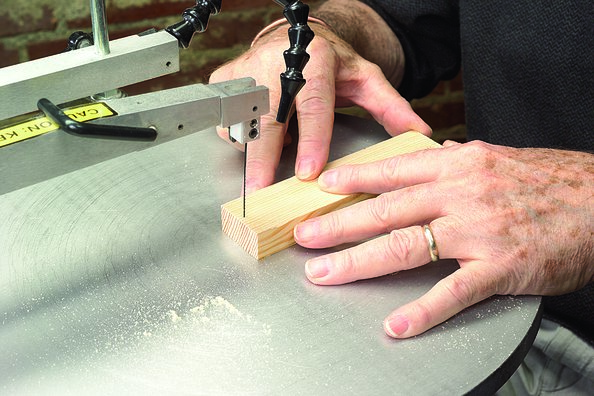
Special tools for intarsia are needed to achieve the best results. A small belt grinder is a good tool to quickly remove materials and smoothen the edges. A dremel or flexible shaft can be used to shape or sand intricate details. You will find different tools and blades for shaping small areas.

Jigsaws - Jigsaws have a limited range of capabilities. They are not capable of making the precise cuts that a scrollsaw can. Sanders are also needed to smoothen out wood surfaces. Intarsia woodworking requires two different types of wood that contrast in color and grain. The wood can then get stained differently. Once the wood has been cut it will be sanded to make a mosaic-like design.
Techniques
As long as you have the right techniques, creating stunning intarsia works isn't as hard as it seems. A pattern can be a great starting point to your artistic creativity. These ideas will help you create stunning intarsia art. Here are some tips:
Select the project design. Print out additional copies of your design. Next, select the type of wood that you want to use. Different wood species have different characteristics. The best way to give your project depth and dimension is to roughen out the wood's thickness. You can also add pieces by glueing on additional layers of wooden. Finalize your project by removing all backing and leaving the finished intarsia.
Woods for Use
This book will help you make stunning inlaid wood pieces, no matter if you are a beginner or an expert. Kathy's progressive approach will teach you everything from the basics of color break and the nuances thereof. Even if you've never made intarsia before, you'll find yourself referencing this book again as you learn more about this fascinating craft.
Select woods that complement each other and have similar grain orientations. To make a teddy, 20 pieces of wood must be made from four different kinds of wood. Each grain has a slightly different texture. You will need a saw that has a fast blade. Once you've identified the wood's colors and grain orientation, it is time to cut and stain.
Colors

The intarsia pieces come in a wide range of colors. The saps of intarsia wood are white, while the heartwoods have a reddish color or are gray-black. Cherry is one example of a wood that darkens with age. Cherry has a light to medium tone at first and then becomes darker with age when exposed to sunlight. Cedar and other woods like it have varying tones. This creates depth for your project.
Intarsia refers to a type art made by joining different pieces of wood together and creating patterns. It is often associated today with Italy but its origins are in the Islamic world. To create three-dimensional effects, woodworkers use different colors of wood with different thicknesses. You will often find intarsia on jewelry boxes, wooden chests and keepsake boxes.
Time-consuming
The intarsia technique is complex and requires the use different types of wood as well as staining techniques. Artists will need to gather different types of wood, stains and paints in order for them to create stunning intarsia art. Birch and plywood are two common types of wood to use, but other types are also suitable. Artists choose the wood they prefer, but it all depends on their individual preferences. Many craftsmen prefer Western Red Cedar to create intarsia projects.
The first step in intarsia is to cut and label each piece of inlay. Next, the artist glues the pieces together. After the glue dries, the woodworker finishes off the piece using a double bevel edge inlay. This time-consuming process requires a great deal of skill, and the finished product is truly a work of art.
FAQ
Do I need to be a genius to succeed in woodworking?
No. Woodworking is not difficult. Anyone can learn to use basic powertools and techniques to create beautiful work of art.
Which material would you recommend for woodworking lessons?
Start with softwood like pine, poplar and ash. You will feel more comfortable with these softwoods, so you can move onto hardwood.
What is the average time it takes to finish furniture?
It depends on the type and complexity of your design as well as the amount of finishing that you use. Hardwoods, for example, require more maintenance than softwoods. Hardwoods tend to be more expensive that softwoods. But they last longer and resist moisture better. The process of finishing a piece of furniture typically takes anywhere from one week to three months.
How much money will I need to get started?
Each project is unique so there aren’t exact numbers. These are the factors that will give you an idea of how much you'll need.
-
Materials cost
-
Tools and equipment
-
Time spent working on the project
-
The hourly rate
-
What amount of profit can you expect to make?
-
No matter if you are looking to hire someone
For those just beginning, it may be a good idea to start small with simple items like boxes and picture frames. As you gain more experience, you will be able tackle more complicated projects.
How do I get started with woodworking?
The best way to learn how to build furniture is by building furniture. You will need tools. There are bound to be mistakes. But if your persistence is consistent, you will soon master the craft.
Start by choosing a project you'd like to complete. You can make a simple box or a large entertainment center. Once you have settled on a specific project, it is time to find a woodworker in your area who is experienced in such work. Ask them for suggestions on the tools you will need and where to buy them. Ask if you can find someone who does this kind work.
What types of woods are best for furniture making?
Woods are classified by their hardness. Softwoods are pine, cedar and cypress. They are great for outdoor furniture as they resist rot. The hardwoods are oak, maple and mahogany. They are generally indoors as they don't weather well outside.
Statistics
- Most woodworkers agree that lumber moisture needs to be under 10% for building furniture. (woodandshop.com)
- The best-paid 10 percent make $76,000, while the lowest-paid 10 percent make $34,000. (zippia.com)
- If your lumber isn't as dry as you would like when you purchase it (over 22% in Glen Huey's opinion…probably over 10-15% in my opinion), then it's a good idea to let it acclimate to your workshop for a couple of weeks. (woodandshop.com)
- The U.S. Bureau of Labor Statistics (BLS) estimates that the number of jobs for woodworkers will decline by 4% between 2019 and 2029. (indeed.com)
External Links
How To
How to join wood with no nails
Woodworking is a popular hobby. It's fun and relaxing because you can use your hands to make something useful from wood. However, there are times when you want to join two pieces of wood together without having to use nails. This article will demonstrate how to do so to preserve the beauty of your woodwork.
You will first need to trim the edges of your wood pieces before joining them. You don't want any sharp corners to cause problems later. Once you've done this, you're ready to start gluing your boards together.
If you are working on hardwood, you should only use glue on one side. If you are using softwoods such pine or cedar, glue should only be applied to one side. Apply the glue to the boards and press them down until they are securely attached. Be sure to let the glue dry before you move on to the next step.
After you have glued the boards together, drill holes in the joints where you intend to place screws. You can choose the type of screw to determine the size of your holes. If you plan to use a 1/2 inch wood screw, drill a hole at least 3/4 inches in depth.
After drilling your holes, drive the screws into the board's backside. You should be careful not to touch the board's front surface. This could cause damage. Don't drive the screws too far into the end. This will prevent splitting in the end grain of the wood.
Once your project is complete, it's time to protect it against the elements. To do this, you can seal the entire furniture piece or just cover the top. You want it to last years, so you can use any product. Some examples include oil-based varnishes, polyurethane, shellac, lacquer, etc.
These products can generally be found in any home improvement shop. It is important to ensure that you purchase the correct product for the job. Remember that some finishes can be toxic, so you should not use them indoors. Always wear protective gear when handling any of these finishes.