You can use the woodturning ring tool to make undercuts on the spindle. When using this tool, you must be present to the spindle and move slowly away from it. You should not pull the cutting tip too fast as this could cause the ring to crack. Before the spindle separates, the inner side of your bead can also be sanded. It is also recommended to use the captive ring tool to make undercuts on the spindle before separating it from the spindle.
Termite tool
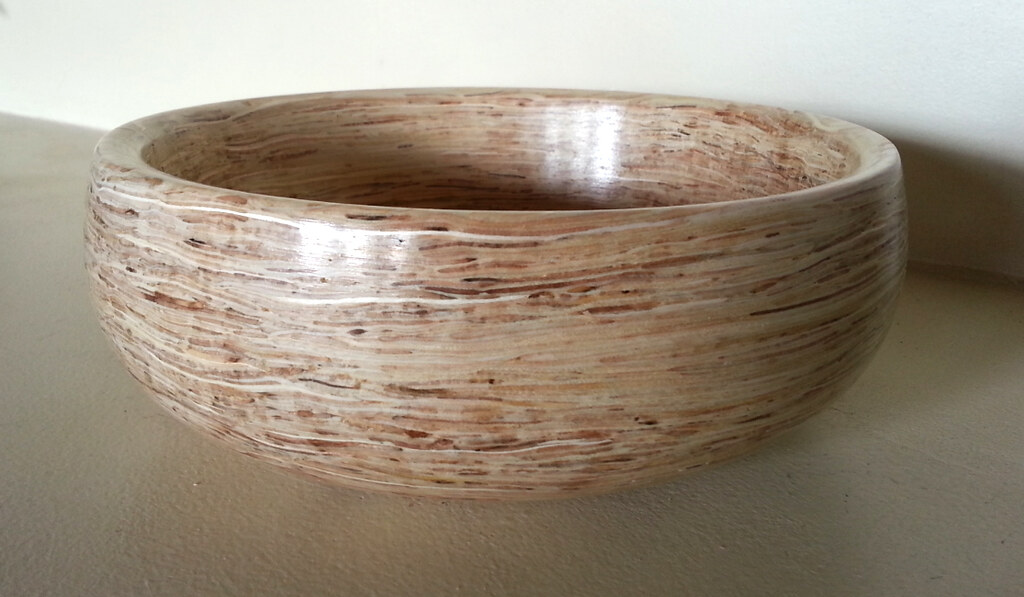
The Termite Tool for Woodturning is a ring-shaped cutter that hollows end grains quickly. It is named Termite due to its smooth cutting and minimal sanding. The Termite tool is especially useful for hollowing goblets, boxes, and other hollow vessels. You can also use the tool to make bowls, vessels.
The Termite tools' ring-shaped cutting edges create shear cuts in any material. Termites are ideal for hollowing small containers without drilling a hole. Unlike a saw, the termite can pick up the cut from the center and produce flat or slightly concave tops. You must first expose the cutting edge to the material before you can use the Termite tools. The wood drive may catch onto your termite tool if you don't.
Hercules
The Hercules woodturning tool ring-tool can be used to turn intricate pen forms or bowls. Its 3/8" round #3 Hunter Carbide Cutter and 5/8" square shank are ideal for rough and finish turning. The lathe's tool support and ways absorb impact from the wooden turning tool. However, the lathe provides a smooth touch that makes final finishing cuts much easier.

Hercules also offers a complete ring-tool kit for woodturning, which includes a drill, a rotary wrench, and a standard charging cable. This tool kit can be ordered online for $25 or $130 in-store. Even if you don't shop during the holiday season, the bundle price can be very attractive. Hercules tools are more durable than those of other competitors, which will help you save money in long-term.
Osprey
Osprey woodturning tools are great tools that can give you a polished finish to your bowls. This tool is made using #2 Hunter Carbide Butter. It has a 1/2" diameter shank. It is excellent for making fine finish cuts, but you can also use it for basic turning tasks. This will be a great gouge for those looking for a brand new one.
Osprey woodturning rings-tools come with a drill. This versatile tool is compatible with both a corded and a drill press. The drill-bit is important for making a precise hole, but a beginner can get by with a Forstner bit. For beginners, you can buy a bigger blank and drill the first few ring with it.
Robert Larson
There are many options if you're thinking of buying a woodturning rings tool. Some people prefer a handmade tool, while some prefer a digital model. Robert Larson Co Gouge Slip is an excellent tool for beginners. It's inexpensive and comes equipped with hardened brass pins and plates. Two pins are included for marking joints. One pin is for standard marking. Both are excellent choices. You may not use all of these pins and gauges.
Benjamin's Best
You've probably seen advertisements for the Benjamin's Best woodturning ring tools. What is the difference between these tools and other competitors? They're different. Benjamin's Best woodturning band tool contains eight pieces. Each of these pieces is specifically designed for a particular purpose. The ring tool is used to create a smooth and even surface for turning. It has a black coating that provides durability.

This ring tool, unlike other woodturning tools comes with a ring. These rings can be decorative or functional, depending on their design. They may even be puzzle pieces for non-turners! Many spindle turns use captive rings. All of these pieces can be made with the ring tool.
CROWN
The CROWN woodturning ring tool is a versatile tool for hollowing thin-walled wet-wood objects. The dual bevel "High Speed Steel", high-strength steel ring gives it a great finish when hollowing into an end grain. It is capable of handling both flat and curved forms with ease. It is an excellent value for money. It is made from stained beech handles and is suitable to a wide range of tasks.
The CROWN woodturning tool is manufactured in Sheffield, England. It is made from the highest quality cryogenic steel. Its double bevel allows the user to cut from both the left and right side of the ring. The tool's sharp edge can withstand years of professional work thanks to its meticulously polished and ground interior. The tool comes with a lifetime warranty. Crown's tools have been designed to last and are indispensable for woodturners.
FAQ
How much will it cost to get started?
There are no exact numbers because every project is different. Consider these factors if you need to estimate the amount of money that you will require.
-
Material costs
-
Tools and equipment
-
Time spent on the Project
-
Hourly rate
-
What is your expectation for profit?
-
No matter if you are looking to hire someone
Start small, if possible. You can make simple boxes or picture frames if you're just getting started. As you gain experience, you'll be able to tackle more complex projects.
Where do I start with woodworking?
You can learn the most effective way to build furniture by actually building it. Although you will need to have tools and may make mistakes along your journey, you'll soon be able to master it.
Begin by choosing the project that you want to finish. You could make something as simple or complex as a box. Or you could build a whole entertainment center. After you have decided on a project to work on, contact a local woodworker that specializes in this type of work. Ask him or her for advice on what tools you'll need and where to find them. You might even ask whether there's someone else you can talk to who does this kind of work.
Do you have any tips on starting a woodworking business?
It takes a lot of effort to start a woodworking business. If you are passionate about your hobby, it will not be difficult to put in the work. You might even enjoy running your own business.
One thing to keep in mind when launching a new venture is that you might encounter unexpected problems along the way. You might run out unexpectedly of funds. You might find customers not willing to pay the amount you expected. You need to be ready for these situations if you want to survive.
A good tip is to open a separate bank account for your business. This will ensure that you always know how much money has come in.
What else should I know about woodworking in general?
It is easy to underestimate how much work it takes to make furniture. Finding the right kind of wood is the most difficult part. There are so many wood options that it can be difficult to choose the right one.
Another issue is that wood does not have the same properties. Woods can warp, split, or crack over time. Before purchasing wood, you should consider these factors.
Statistics
- Average lumber prices rose about 600 percent between April 2020 and May 2021. (familyhandyman.com)
- Woodworkers on the lower end of that spectrum, the bottom 10% to be exact, make roughly $24,000 a year, while the top 10% makes $108,000. (zippia.com)
- Overall employment of woodworkers is projected to grow 8 percent from 2020 to 2030, about as fast as the average for all occupations. (bls.gov)
- The U.S. Bureau of Labor Statistics (BLS) estimates that the number of jobs for woodworkers will decline by 4% between 2019 and 2029. (indeed.com)
External Links
How To
How to join wooden boards without using nails
Woodworking is a hobby that many people enjoy doing. Woodworking is a relaxing hobby that allows you to use your hands to create useful things from wood. You might want to join two pieces from the same wood, but you don't need to use nails. This article will show you how to do it to make your woodwork projects look great.
The first thing you'll need to do is cut off any rough edges from your pieces of wood before joining them together. Do not leave any sharp corners as they could cause problems down in the future. After you have completed this step, you are ready to glue your boards together.
If you are working with hardwood, only one side should be glue. For softwoods like cedar and pine, glue should be applied to both sides. Once the glue has dried, press the boards together until they are fully adhered. Be sure to let the glue dry before you move on to the next step.
After you have glued the boards together, drill holes in the joints where you intend to place screws. These holes will differ depending on the type and size of screw you are using. If you are going to use a half-inch wood screw, you will need to drill at least 3/4 inch deep.
Once you've drilled your holes, you'll want to drive the screws through the joint and into the backside of the board. Avoid hitting the board's top surface. Otherwise, you could ruin the finish. Don't drive the screws too far into the end. This will prevent splitting in the end grain of the wood.
After your project is completed, you will need to protect it from the weather. You can either seal the entire piece of furniture or cover the top. It doesn't matter what method you use, you want something that will last many years. You can choose from oil-based varnishes or polyurethane, shellac and lacquer as examples.
You can find these products at most home improvement stores. Be sure to choose the right one for your project. Don't forget to keep in mind that some finishes are toxic. When handling certain finishes, wear protective gear.