
Looking for free scroll saw silhouette patterns? Here are a few options. Scroll saw silhouette patterns are a great way of adding detail to your woodworking project. You can choose from a wide variety of scroll saw patterns, such as a traditional or whimsical silhouette. Scroll saw patterns can also be found online. Scroll saw templates can help you make anything, from a framed mirror or a beautiful box.
Woodworking scroll saw patterns free
Scroll saws are a great tool for woodworking beginners. You can make many types of woodworking projects with this tool, from simple beginner cuts to more complex ones. From the most complicated wood projects to those that are easy to make with a beginner's saw, you can find a variety of patterns online to get you started. These patterns are perfect for kids as well as projects for the house. These patterns are completely free and can be displayed anywhere.
Another type of project is the perpetual calendar. This project requires several pieces wood. It is a great way of burning off nervous energy and building your skills. Bearwood offers a perpetual calendar plan online. All plans are available online at Bearwood. To make a scrollsaw plaque with decorative details, you can also use one the free patterns. You can also make a pumpkin if you prefer a different type of project. Although they are very complicated, these make wonderful Halloween decorations.
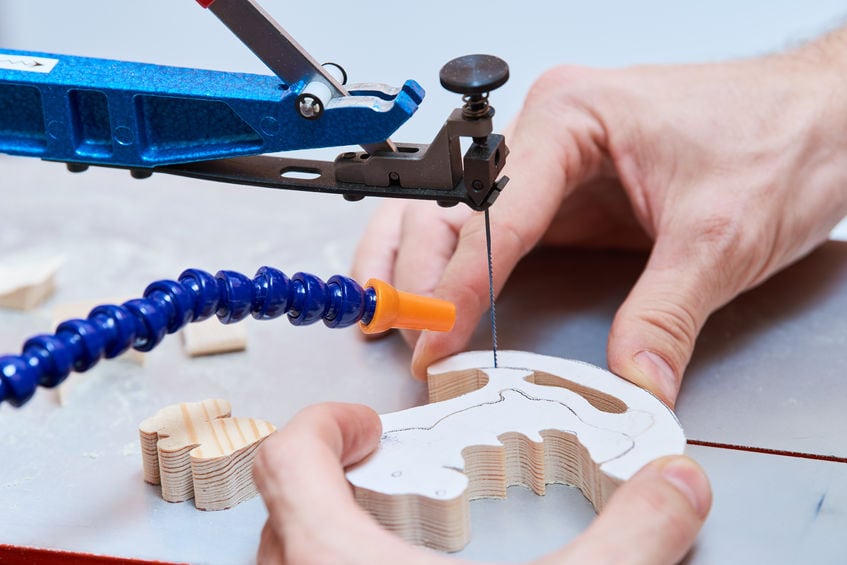
Stacking
Stacking scrollsaw silhouette patterns can be a great way of showcasing your work and giving it a professional look. Scroll saw silhouette patterns come in a variety of styles, from easy beginner's cuts to intricate designs for advanced users. There are many free patterns for beginners, no matter if you are a novice or an advanced scroll saw user. These patterns are great for creating your own masterpieces and they're fun to display and create with kids.
Woodworking-related websites also offer free online woodworking patterns. There are many options available, and the quality and quantity of information can vary widely. It is important to evaluate and compare different options before you make a decision. This is especially important for those who are just starting to scroll saw. You'll find that free patterns can be both easy and difficult. This book features 120 complex designs that you can make. These images are detailed with step-by-step photos and detailed instructions.
Neal Moore’s book
This book includes many projects and a guide to selecting the right wood and other supplies. Each pattern can be used in a variety craft media such as woodworking, jewelry making and other crafts. You will also find fascinating information about astrology in the book. The patterns range from simple to complex, and the variety in the book makes it easy to find the perfect one for your personal style and needs.
The book offers everything a beginner needs, from basic cutting skills to more advanced techniques. Projects include a fish silhouette, a butterfly with interior cuts, and a collapsible wooden basket. This book also contains information about new scroll saw manufacturers. For anyone who is just starting out in woodworking, it is a great resource. You will learn basic and advanced techniques to create beautiful scroll saw portraits.
Neal Moore's book about inlay using a scroll saw
This beginner's guide on inlay with scroll saws has inspiring projects and detailed instructions. Examples include everything from die-cut stationary to a butterfly that has interior cuts. Also, you'll find unique ornaments and wooden boxes designs. Neal Moore has taught hundreds to use the scrollsaw safely, so you're bound to find something that catches your attention.

Neal Moore also includes over 50 patterns. A section is included on how to get started. For new scrollers, you can learn how choose wood, cut, transfer and modify patterns. The getting-started section also offers tips for more experienced scrollers on how to create their own patterns. This book is both a useful resource for intermediate and beginner woodworkers. You will find it easy to follow the instructions and create beautiful masterpieces.
FAQ
What is the difference in plywood and particleboard?
Plywood is a combination of layers of wood, which are then pressed together under high pressure. Plywood comes with a range of thicknesses, and it is most commonly used for flooring and cabinets. Particle board can be made from sawdust, resin, and then compressed to make large blocks. It is used primarily for home improvements. Both types of boards can be easily cut and are durable.
How can I keep my shop organized?
To keep your workshop tidy and organized, you should first create a place for tools storage. Make sure your tools are clean and free of debris and dust so they can be used properly. You can hang tools and accessories with pegboard hooks.
What would be your first step in woodworking?
Start with softwoods such as pine and poplar. You will feel more comfortable with these softwoods, so you can move onto hardwood.
What wooden items sell well?
Wood that has been harvested sustainably is the best-selling type of wood.
Oak, cherry and mahogany are the most sought-after wood types for furniture.
These woods are strong and durable, with beautiful grain patterns. They also last for many years if cared for properly.
To prevent moisture damage to wood furniture, it is important that it be painted before any other surfaces. This covers all surfaces, drawers included, as well as doors and handles.
A paint that resists water is the best choice to ensure that furniture lasts a long time.
It is recommended to use an oil-based primer, then apply two coats. Depending on how much wear you expect, you might need to apply more coats of topcoat.
Spray cans or aerosol paints should be avoided. These products contain solvents that evaporate quickly and leave behind harmful fumes.
How can I learn basic woodworking skills
A great way to start learning how to build furniture is by building a simple bench for yourself. You can use any wood you have in your home to complete this project. If you're not sure which kind of wood to choose, you can purchase cheap pine boards at Lowes and Home Depot. Once you have built your bench, you will need to sand it off and then finish it with a stain/varnish.
How often do I need to buy new supplies
Over time, you may need to replace your tools. Sharpening hand tools is a must. Power tools will require replacement parts every so often. Try spreading your purchases over a few months so you don't buy too many at once.
Statistics
- The best-paid 10 percent make $76,000, while the lowest-paid 10 percent make $34,000. (zippia.com)
- Woodworkers on the lower end of that spectrum, the bottom 10% to be exact, make roughly $24,000 a year, while the top 10% makes $108,000. (zippia.com)
- The U.S. Bureau of Labor Statistics (BLS) estimates that the number of jobs for woodworkers will decline by 4% between 2019 and 2029. (indeed.com)
- Average lumber prices rose about 600 percent between April 2020 and May 2021. (familyhandyman.com)
External Links
How To
Tips for driving a nail in wood
When driving a nail into wood, it is important to first choose the correct size and kind of hammer. The most commonly used types of Hammers are claw hammers. Each kind of hammer has its own advantages and disadvantages. A claw hammer, for example, is the best choice if you need to hit nails hard. However, it's not easy to know exactly where the impact will land. The sledgehammer works well for large areas, but is too heavy for smaller tasks.
Place your hand flat on the side of your chosen hammer so that the handle rests in your palm. Grab the handle tightly, but do not squeeze too hard. Your wrist should be relaxed while you hold the hammer straight upwards. Next, swing the hammer toward the ground and aim for the nail's center. You should feel the impact of your hammer hitting the nail. If you're having trouble getting the hang of swinging a hammer, practice with a block of wood until you get the rhythm down.
You can now drive the nail by holding the hammer to your body. To ensure that the nail is perpendicular on the surface of the wooden floor, position it. Keep your eyes focused directly on the tip of the nail. Swing your hammer forward. Then follow through with the motions of the hammerhead. Continue this motion several times, slowly increasing the speed of each swing. After mastering the technique, you can add power to your swings. To make it more powerful, hold the hammer up high to your shoulder and then bring it down. This will allow you to exert more energy.
Once you have made the first hole, remove your hammer. To pull out the remaining nails, use a screwdriver or pry bar. To prevent splitting the wood, ensure you keep the nail heads flush against the board's surface.