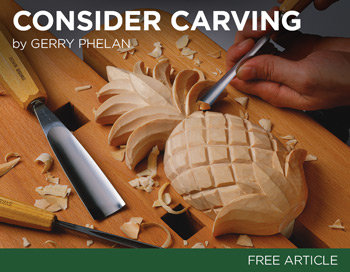
Select a piece of wood to begin carving a face out of wood. Make the necessary cuts. The expert will guide you through the process using a step-by, video tutorial. You will be able to carve the face more realistically by using the progressive cut. A lifelike face can be created by the progression of the noses on the wooden piece. To create a lifelike finish, you can use colored dyes or shellac.
Hardwoods
Before carving a face out of wood, it is important to consider what type of wood you will be using. Hardwoods, a type of tree with broad leaves, can grow in different climate zones. Hardwoods are suitable for various purposes due to their density, strength, appearance and versatility. While hardwoods may be more affordable than softwoods due to their durability and fire resistance, they are still very durable.
Softwoods such as butternut or basswood are good options for beginners to wood carving. These woods are easy to work with, and are great for beginners. You should keep in mind that soft woods will not have the same quality or finish as hardwoods. Before you decide on a type of wood, try out different types.
Softwoods
When carving a face from wood, the first step is to choose the right softwood. Softwoods can be more difficult to carve because they often have more knots. You can also break them more easily if you use large strokes. Beginners will often cut small pieces of wood to reduce detail. While it's not a major problem, this is something to be aware.
Some hardwoods are easier than others. Aspen, butternut, and basswood are among the easiest to work with. Use knives with a sharper bevel to achieve this. Softwoods also make it easier to work with than hardwoods. This allows you to carve along or against the grain. The quality of the finished product will depend upon the wood you use to carve it.
Colored Dyes
To create a vibrant, detailed finish on a wood carving, try using colored dyes. These dyes come in many colors, and you can mix them with alcohol or water to make your own unique color. You can also use shellac and colored dyes to lighten the wood. After applying dyes, ventilate your work area and clean your brushes with denatured alcohol. Paste wax is another option. An excessive level of glossiness may cause distractions to your work. Use 0000 steelwool to get rid of any excess glossiness.
You can easily apply wood dyes in many different types. Wood dyes can be used with any topcoat and are very easy to apply. These dyes also solve common finishing problems. They are easy to mix and use because they come in many primary colors. They are also available in many shades that can be mixed to suit individual preferences. They can be mixed to create new colors.
Shellac
Shellac should be available before you apply it to your wood carvings. Although you can buy a jar of the stuff, it is easier to use a brush to apply it. Generally, a two-pound cut will do. This is because the shellac will gradually build up and will reduce brush marks. Because shellac is very thin, it is best to purchase a thicker than a thinner cut. Make your own pad out of small pieces of cotton and lintfree cloth. This will ensure you get the right amount. Then, dip the tip of your brush into the shellac and let the excess flow back into the bottle.
Shellac is used to highlight grain and give it color. Shellac can be mixed with different colors to create custom blends. The lac can be used to darken the color. Shellac, unlike other wood finishes won't turn yellow or become cloudy. You can also make many faces with shellac because it will last longer. And you can do this with any kind of wood carving project!
Gouges
There are many types of gouges. The straight and palm types of gouges tend to be the most popular. Straight gouges can only be held with one hand. Palm gouges, on the other hand, have shorter shafts. Handheld carving is made easier by the shorter handles. Also known as veiners, palm gouges are great for carving faces in wood. Before you start carving, there are some things that you need to know.
First, learn how to choose the best gouge. You need a gouge that can carve a shallow groove. It is important to have a sharp edge, small sweep and a very small tool. Gouges are often categorized according to their size. A 3/10-inch gouge will produce the same size cut as a 5/10-inch gouge. As the first number increases the scoop between edges becomes deeper, and the sweep becomes progressively curvier. A gouge with a small stroke will create a shallow profile.
FAQ
Can I refinish furniture that I make?
Yes! Yes! There are many methods to refinish antique furniture without hiring a professional. Here are a few suggestions:
Use sandpaper for removing stains and scratches. Use a clean cloth to wipe the surface.
Apply clear polyurethane finish. Before moving furniture, let dry completely.
Acrylic paint can be used to paint furniture.
You can stain the furniture instead of using paint. The furniture will get a rich look with the stain.
Apply shellac wax. Applying wax will give the wood shine and protection.
Are there any other things I should know regarding woodworking?
It is easy for people to overlook the work involved in furniture making. Finding the right wood is the hardest part. There are so many varieties of wood available that choosing one can be difficult.
Another issue is that wood does not have the same properties. Some woods will warp and others will split or crack. Before purchasing wood, you should consider these factors.
How can I keep my shop organised?
A designated place to store your tools is the first step towards keeping your workshop clean. To keep your tools sharp and ready for work, keep them clean of dust and debris. Pegboard hooks can be used to hang tools and accessories.
How do I know what type of wood I'm dealing with?
Always check the label before purchasing wood. The label should detail the wood species, its moisture content and whether it has been treated or not.
What wooden items do you sell well?
The best-selling wooden items are those which have been made from wood that was harvested sustainably.
Oak, cherry and mahogany are the most sought-after wood types for furniture.
These woods are strong and durable, with beautiful grain patterns. They will last for many years, if taken care of properly.
To prevent moisture damage, wood furniture should always first be painted. This covers all surfaces, drawers included, as well as doors and handles.
If you want to make sure that your furniture lasts as long as possible, then you should choose a paint that is resistant to water.
Followed by two coats, you should apply a quality oil-based primer. Depending on how much wear you expect, you might need to apply more coats of topcoat.
Spray cans or aerosol paints should be avoided. These products contain solvents that evaporate quickly and leave behind harmful fumes.
Can this be a way to make money?
Yes! Many woodworkers have this ability. According to U.S. Bureau of Labor Statistics (BLS), woodworkers earned a median annual salary of $34,000 in May 2012. This is significantly higher than the national average, which is $31,000 per year.
How can I determine which tools are most suitable for me?
When shopping for tools, it helps to think about your needs and preferences. Do you prefer metal handles or plastic? What size screws or nails do you prefer? Do you prefer hand tools over power tools?
Statistics
- Overall employment of woodworkers is projected to grow 8 percent from 2020 to 2030, about as fast as the average for all occupations. (bls.gov)
- The best-paid 10 percent make $76,000, while the lowest-paid 10 percent make $34,000. (zippia.com)
- Woodworkers on the lower end of that spectrum, the bottom 10% to be exact, make roughly $24,000 a year, while the top 10% makes $108,000. (zippia.com)
- Average lumber prices rose about 600 percent between April 2020 and May 2021. (familyhandyman.com)
External Links
How To
Tips for driving a nail in wood
To drive a nail into wood, the first step is to select the right size and type hammer. The most common types of hammers are claw hammers, sledgehammers, mallets, ball peen hammers, and hatchets. Each type of tool has its advantages and drawbacks. A claw hammer, for example, is the best choice if you need to hit nails hard. However, it's not easy to know exactly where the impact will land. A sledgehammer is useful for striking large areas at once but too heavy to be effective for smaller tasks.
After you've chosen the right tool, hold your hand flat to the handle so it rests comfortably in one of your palms. You can grip the handle with your fingers, but not so tight that it causes injury. You should hold the hammer straight-up, with your wrist still relaxed. Next, swing the hammer toward the ground and aim for the nail's center. The impact of the hammer hitting the nail should be felt. If you're having trouble getting the hang of swinging a hammer, practice with a block of wood until you get the rhythm down.
You can now drive the nail by holding the hammer to your body. You will need to position the nail so it is parallel to the wood. Keep your focus on the tip of each nail. Then, swing the hammer forward. Next, follow the motion of your hammerhead. Continue this motion several times, slowly increasing the speed of each swing. After mastering the technique, you can add power to your swings. Hold the hammer high above your shoulders and pull it down. This way, you'll be able to put more energy behind your blows.
Once you've nailed the first hole, remove the hammer from the nail. To remove the remainder of the nails, you can use a screwdriver/pry bar. Keep the nail heads parallel to the board's surfaces in order to avoid splitting wood.